Blog

Optimizing WordPress Marketer Notification Box Settings
As a Wikipedia editor, my goal is to provide information neutrally and factually. This guide will walk you through optimizing your WordPress marketer notification box settings. Think of this notification box as a digital billboard strategically placed on your website; its effectiveness hinges on how well you configure it to capture attention and deliver value.
The marketer notification box, often implemented through plugins or themes, serves as a dedicated area on your WordPress website to display targeted messages to your visitors. These messages can range from promotional offers and new content announcements to calls for newsletter subscriptions and social media engagement. Its primary purpose is to guide user behavior and encourage specific actions that align with your marketing objectives.
Core Functionality and Purpose
At its heart, the notification box is a communication tool. It’s designed to interrupt the user’s browsing flow, albeit subtly, to present information that is considered important or time-sensitive. Unlike static elements on a page, a notification box can be dynamic, appearing based on user behavior, page content, or predefined rules. This dynamism allows for personalized messaging, increasing the likelihood of engagement.
Types of Notification Boxes
Notification boxes manifest in various forms. Some are small, unobtrusive banners at the top or bottom of the screen, akin to a discreet signpost. Others are pop-ups that overlay the content, demanding more immediate attention, like a storefront window display. There are also slide-in boxes that gracefully emerge from the side, reminiscent of a helpful assistant approaching you. The type of box you choose will significantly influence its perceived intrusiveness and its potential impact.
Key Benefits for Marketers
The strategic deployment of notification boxes offers several advantages:
- Increased Conversion Rates: By presenting targeted offers or calls to action at opportune moments, you can guide users towards desired outcomes, such as purchases or sign-ups.
- Improved Lead Generation: Notification boxes are excellent for capturing email addresses, building your subscriber list, and fostering a direct line of communication with potential customers.
- Enhanced User Engagement: Announcing new blog posts, upcoming events, or valuable resources can draw users back to your content and encourage deeper interaction with your site.
- Reduced Cart Abandonment: For e-commerce sites, timely notifications offering discounts or free shipping can persuade hesitant buyers to complete their purchase.
- Promotional Visibility: They provide a prime location to highlight sales, special offers, or new product launches.
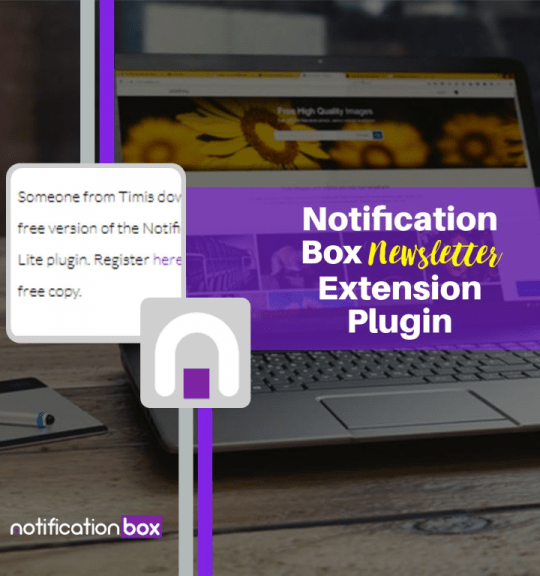
In addition to understanding the essential notification box settings every WordPress marketer should configure, it’s also beneficial to explore how notification box extensions can enhance user engagement on your site. A related article that delves into this topic is available at Notification Box Extensions: Newsletter and Cookies, which provides insights on utilizing these tools effectively to capture leads and ensure compliance with cookie regulations.
Strategic Placement and Display Rules
The effectiveness of your marketer notification box is not solely determined by its content but also by where and when it appears. Imagine placing a valuable offer in an aisle of a store where no one looks; its appeal is diminished. The same applies to digital real estate.
Triggering Mechanisms
Notification boxes can be configured to appear based on specific user actions or inactions. These triggers are designed to present the notification when the user is most receptive or when their behavior suggests a particular interest.
Time-Based Triggers
These triggers activate a notification after a user has spent a certain amount of time on a page or the entire website. For example, a visitor who has been browsing your product pages for five minutes might be a good candidate for a discount offer if they haven’t yet added an item to their cart. This is akin to a shopkeeper noticing you’ve been looking at a particular item for a while and offering assistance.
Scroll-Based Triggers
Notifications can be set to appear as a user scrolls down a page. This is useful for content-heavy pages where you want to deliver a call to action or a related resource as the user progresses through the material. It’s like a bookmark appearing as you read further into a book, highlighting an important section.
Exit-Intent Triggers
This is a powerful trigger that detects when a user is about to leave your website, typically by moving their mouse towards the browser’s close button. An exit-intent notification is your last chance to retain the visitor. It’s like a concierge offering you a parting gift just as you’re about to exit a luxurious hotel. This is often used for offering a last-minute discount or a compelling reason to stay.
Click-Based Triggers
While less common for initial display, click-based triggers can be used within notification boxes themselves, leading to further interactions or revealing more detailed information. This is similar to clicking on a highlighted phrase in a document to expand on a topic.
Targeting Specific Pages and User Segments
Not all visitors are the same, and neither are their needs or interests. Therefore, tailoring your notification box display is crucial.
Page-Specific Targeting
You can choose to display a notification box only on certain pages. For instance, a notification about a blog post’s related e-book might appear only on that specific blog post page. Conversely, a site-wide promotion could be displayed on all pages. This ensures the message remains relevant to the user’s current context.
User Behavior Targeting
Advanced settings allow you to target users based on their past interactions. For example, you could show a special offer to first-time visitors or a re-engagement message to users who haven’t visited in a while. This is akin to recognizing a regular customer and offering them personalized service.
Referring Source Targeting
You can also target users based on where they came from. A visitor arriving from a specific partner website might see a tailored offer relevant to that partnership. This allows you to acknowledge and capitalize on referral traffic.
Frequency Capping and User Experience
While attention-grabbing, notification boxes, if overused, can become an irritant, driving visitors away rather than engaging them.
Avoiding Over-Notification
Implementing frequency capping prevents a user from being bombarded with the same or multiple notifications repeatedly. For example, you might set a rule so a user only sees a specific notification once every few days or only after a certain number of page views. This maintains a positive user experience.
Design Considerations for Intrusiveness
The visual design of your notification box plays a significant role in its perceived intrusiveness. A small, discreet banner is less disruptive than a full-screen overlay. Balance the need for visibility with the user’s desire to browse unimpeded.
Crafting Compelling Notification Content
The words you use within your notification box are the vehicle for your marketing message. Just as a well-crafted headline draws a reader in, compelling copy drives action.
Headline Clarity and Impact
Your headline is the first thing a user will read. It must be clear, concise, and immediately communicate the value proposition.
Actionable Language
Use verbs that encourage immediate response. Phrases like “Download Now,” “Get 10% Off,” or “Sign Up Today” are more effective than passive statements.
Benefit-Oriented Messaging
Focus on what the user gains. Instead of “Our New Product,” try “Unlock Faster Performance with Our New Product.” Highlight the solution to their problem or the fulfillment of their desire.
Call to Action (CTA) Design
The CTA is the gateway to the desired user action. It needs to be prominent and unambiguous.
Clear Button Text
The text on your CTA button should clearly state the action. “Learn More,” “Claim Offer,” or “Subscribe” are direct and understandable.
Visual Prominence
Ensure your CTA button stands out visually from the rest of the notification content. Use contrasting colors and a sufficient size to make it easy to click.
Personalization and Relevance
Generic messages have a lower engagement rate. Tailoring your notification content significantly improves its effectiveness.
Dynamic Content Insertion
If your plugin supports it, you can dynamically insert elements like the user’s name or refer to their browsing history. For example, “Hi [Name], we noticed you were looking at [Product Category] – here’s a special discount.”
Contextual Messaging
Ensure the message aligns with the page the user is viewing or their known interests. A notification on a blog post about healthy eating should offer something related, not a discount on sugary snacks.
Urgency and Scarcity (Used Ethically)
These tactics can be effective in driving immediate action, but they must be used responsibly to maintain trust.
Limited-Time Offers
Clearly state when an offer will expire. “This offer ends in 24 hours!” creates a sense of urgency.
Limited Stock/Availability
If applicable, mention limited quantities. “Only 50 left at this price!” can encourage faster decision-making. However, avoid fabricating scarcity, as this erodes credibility.
Configuring Plugin Settings for Optimal Performance
The specific settings available will vary depending on the WordPress notification box plugin you use, but common configurations exist that are essential for effective deployment. Think of these settings as the controls on a sophisticated camera, allowing you to fine-tune every aspect of the output.
General Plugin Settings
These are the foundational settings that govern the overall behavior of your notification boxes.
Enabling/Disabling Features
Most plugins offer a wealth of features. Identify which ones directly support your marketing goals and enable them. Unnecessary features can complicate the interface and potentially lead to performance issues.
Default Styling Options
Many plugins provide pre-designed templates or customizable styling options. Choose a style that aligns with your website’s branding and is visually appealing without being distracting.
Responsiveness and Mobile Optimization
Ensure your notification box displays correctly and functions on all devices, especially mobile. A notification that is difficult to close or read on a smartphone will likely be ignored or cause frustration.
Display Rules and Triggers Configuration
This is where you refine when and where your notifications appear, as discussed in the “Strategic Placement and Display Rules” section.
Setting Specific Triggers
Configure time delays, scroll percentages, or exit-intent detection as needed. Accurately setting these parameters is crucial for maximizing engagement and minimizing annoyance.
Page and Post Targeting
Select the specific pages, categories, or tags where you want your notifications to be visible. Conversely, if there are areas where notifications are inappropriate, ensure they are excluded.
User Role and Session Targeting
Some advanced plugins allow targeting based on whether a user is logged in or based on their user role. This can be useful for offering specific content or promotions to registered users.
Content and Design Customization
This section covers the visual and textual elements of your notification box.
Editing Text and Headlines
Input your carefully crafted headlines, body copy, and calls to action. Pay close attention to character limits and readability.
Button Styling and Link Configuration
Customize the appearance of your CTA buttons and ensure they link to the correct destination URL. Test these links thoroughly.
Image and Media Integration
If your plugin supports it, consider adding relevant images or even short videos to enhance engagement. Ensure media is optimized for web use to maintain fast loading times.
A/B Testing and Analytics Integration
The most powerful aspect of optimizing these settings is the ability to measure and adapt.
Setting Up A/B Tests
Many plugins allow you to create multiple versions of a notification (e.g., different headlines or CTAs) and test which performs best. This is akin to conducting small experiments to discover what resonates most with your audience.
Integrating with Analytics Platforms
Connect your notification plugin to Google Analytics or other tracking tools. This allows you to monitor key metrics like impressions, clicks, and conversions associated with your notifications.
In the ever-evolving world of WordPress marketing, staying updated with the latest features is crucial for maximizing engagement. A great resource to explore is the article on the recent release of Notification Box version 1.7, which highlights improvements in mobile display settings. You can read more about these enhancements and how they can benefit your marketing strategy by visiting this informative article. Configuring essential notification box settings can significantly enhance user experience and drive conversions, making it a vital aspect of your WordPress marketing efforts.
Measuring and Iterating for Continuous Improvement
| Setting | Description | Recommended Configuration | Purpose/Benefit |
|---|---|---|---|
| Notification Type | Choose the type of notification box (e.g., info, warning, success, error) | Info or Success for general updates; Warning for urgent alerts | Sets the tone and urgency of the message to users |
| Display Location | Where the notification box appears on the page | Top of the page or above the header | Ensures maximum visibility without disrupting user experience |
| Visibility Rules | Conditions under which the notification is shown (e.g., user role, page type) | Show to all visitors or specific user roles like subscribers | Targets the right audience for relevant messaging |
| Dismissal Options | Allow users to close or dismiss the notification | Enable dismiss with cookie to remember user choice | Improves user experience by preventing repeated annoyance |
| Timing & Duration | When and how long the notification is displayed | Show immediately on page load; auto-hide after 10 seconds | Balances visibility with non-intrusiveness |
| Call to Action (CTA) | Include buttons or links within the notification | Add a clear CTA like “Subscribe Now” or “Learn More” | Drives user engagement and conversions |
| Styling & Branding | Customize colors, fonts, and layout to match brand | Use brand colors and readable fonts consistent with site design | Maintains brand consistency and enhances visual appeal |
| Mobile Responsiveness | Ensure notification displays properly on mobile devices | Responsive design with appropriate sizing and spacing | Provides a seamless experience across all devices |
| Analytics Tracking | Track views, clicks, and dismissals of the notification | Integrate with Google Analytics or built-in tracking | Measures effectiveness and informs optimization |
| Content Updates | Frequency and ease of updating notification content | Use dynamic content or easy-to-edit text fields | Keeps notifications relevant and timely |
Optimization is not a one-time task; it’s an ongoing process of analysis and refinement. Think of it as tending a garden; consistent care yields better results. Without measurement, you are essentially flying blind, hoping for the best.
Key Performance Indicators (KPIs) to Track
Understanding what to measure is the first step. The success of your notification boxes can be gauged by several metrics.
Impression Rate
This measures how many times your notification box was displayed to a user. It’s a basic measure of visibility.
Click-Through Rate (CTR)
CTR is the percentage of users who saw your notification and then clicked on a link within it. A higher CTR generally indicates more compelling content and a relevant offer.
Conversion Rate
This is the ultimate measure of success. It tracks how many users who clicked on your notification completed the desired action (e.g., made a purchase, signed up for a newsletter).
Bounce Rate on Notification Click
If users are clicking your notification but immediately leaving the landing page, it indicates a disconnect between the notification’s promise and the actual page content.
Analyzing A/B Test Results
If you’ve been conducting A/B tests, dedicate time to analyzing the data.
Identifying Winning Variations
Determine which version of your notification consistently achieved higher engagement or conversion rates.
Learning from Underperforming Variations
Understand why certain variations didn’t perform as well. Was the headline unclear? Was the CTA unappealing? This provides valuable insights for future iterations.
Iterative Optimization Strategies
Based on your data analysis, implement changes to improve performance.
Refining Content and Copy
Adjust headlines, calls to action, and body text based on what the data tells you resonates best with your audience.
Adjusting Display Rules and Triggers
Experiment with different timing, scroll depths, or exit-intent thresholds. Perhaps a slightly longer delay before appearing increases engagement.
Modifying Design and Layout
Small tweaks to button color, font size, or the inclusion/exclusion of images can impact performance.
User Feedback and Experience Beyond Metrics
While quantitative data is crucial, don’t neglect qualitative feedback.
Monitoring Comments and Support Inquiries
Are users expressing frustration with notifications? This is a sign that your settings may need adjustment.
Observing User Flow
If possible, use heatmaps or session recording tools to see how users interact with your notification boxes and the surrounding content. This can reveal unexpected behavior patterns.
For WordPress marketers looking to enhance their website’s engagement, understanding the essential notification box settings is crucial. A related article that delves deeper into optimizing your website’s performance is available at this link, which discusses the upcoming features in version 1.3 that can significantly improve user interaction. By configuring the right settings, you can ensure that your notifications are not only effective but also aligned with your marketing goals.
Advanced Techniques and Integrations
Once you have a solid grasp of the fundamentals, you can explore more sophisticated methods to enhance your marketer notification box strategy. These advanced techniques can transform a functional tool into a powerful engine for growth.
Leveraging CRM and Marketing Automation Integration
Connecting your notification box plugin to your Customer Relationship Management (CRM) system or marketing automation platform opens up a world of personalized communication.
Segmented Campaigns Based on CRM Data
If your CRM holds valuable data about your customers (e.g., purchase history, interests), you can use this to display highly targeted notifications. For example, a customer who frequently purchases a specific product category might receive an early notification about a sale in that area. This is like a personal shopper anticipating your needs.
Triggering Automated Workflows
When a user interacts with a notification (e.g., signs up for a newsletter), you can automate subsequent steps in your marketing funnel. This could involve sending a welcome email sequence, adding them to a specific email list, or creating a follow-up task for your sales team.
Implementing Geo-Targeting for Local Businesses
For businesses with a physical presence, geo-targeting can be a highly effective strategy.
Location-Specific Offers
Display notifications with offers or event information relevant to a user’s geographic location. A restaurant might offer a lunch special to users within a certain radius of their establishment.
Language-Specific Notifications
If you cater to an international audience, you can display notifications in the user’s preferred language based on their IP address or browser settings.
Advanced Pop-up Behavior and Animation
While basic animations can be distracting, well-executed animations can enhance user experience and draw attention more effectively.
Subtle Entrance and Exit Animations
Instead of jarring pop-ups, consider using animations that are smooth and non-disruptive, like a gentle slide-in or fade-in.
Interactive Elements within Notifications
Your notification box can be more than just a static CTA. Imagine a mini-quiz or a slider for a discount code that interacts with the user.
Using Notifications for Loyalty Programs and Upselling
Beyond initial lead generation, notification boxes can play a role in customer retention and increasing average order value.
Promoting Loyalty Program Benefits
Remind users about their loyalty points, upcoming rewards, or exclusive perks for being a member.
Suggesting Complementary Products
When a user is viewing a product, display a notification suggesting a complementary item they might also be interested in. This is a subtle upsell that can significantly boost revenue.
By systematically configuring your WordPress marketer notification box settings and continuously iterating based on data, you can transform these digital billboards into highly effective tools that guide your visitors, enhance their experience, and drive tangible business results.
TRY NOTIFICATION BOX WORDPRESS PLUGIN
FAQs
What is a notification box in WordPress marketing?
A notification box in WordPress marketing is a customizable message area used to display important announcements, promotions, or alerts to website visitors. It helps marketers capture attention and drive user engagement.
Why are notification box settings important for WordPress marketers?
Notification box settings are crucial because they control the appearance, behavior, and targeting of the notifications. Proper configuration ensures messages are timely, relevant, and visually appealing, which can improve conversion rates and user experience.
Which essential settings should every WordPress marketer configure in a notification box?
Key settings include the message content, display triggers (such as time delay or scroll percentage), targeting rules (like user roles or pages), design customization (colors, fonts, and positioning), and dismissal options (close buttons or auto-hide timers).
Can notification boxes be targeted to specific user groups in WordPress?
Yes, many WordPress notification box plugins allow marketers to target specific user groups based on criteria such as logged-in status, user roles, geographic location, or referral source, enabling personalized messaging.
How can notification boxes impact website performance?
If not optimized, notification boxes can slow down page load times or annoy users with intrusive behavior. Properly configured settings help maintain fast performance and positive user experience by controlling when and how notifications appear.
BUY NOW
-
Sale!

Notification Box Lifetime Deal Package
Original price was: $278.00.$160.00Current price is: $160.00. Add to cart -
Extension – Cookie Close Notification Box
$19.00 Add to cart -
Extension – Notification Box Newsletter
$29.00 Add to cart -
Sale!
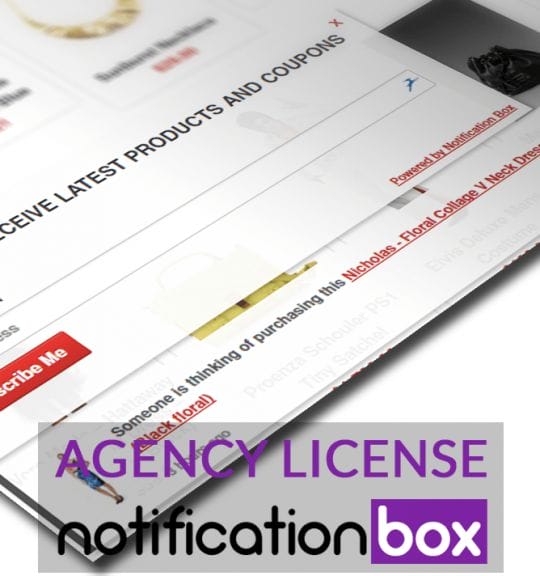
Agency License – Notification Box – WordPress Plugin
Original price was: $230.00.$150.00Current price is: $150.00. Add to cart -
Sale!
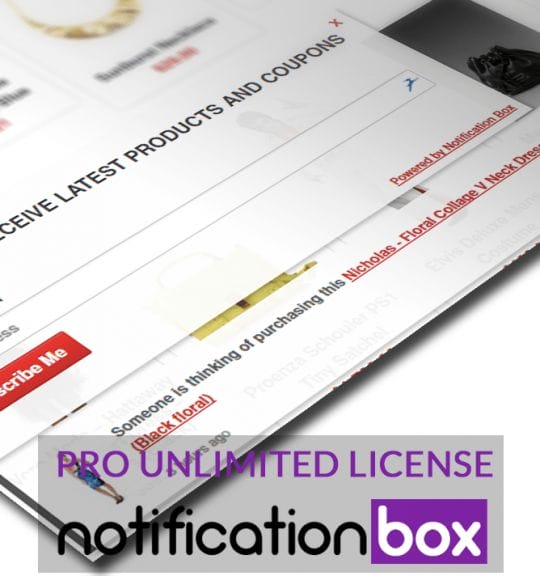
Unlimited License – Notification Box Pro – WordPress Plugin
Original price was: $79.00.$60.00Current price is: $60.00. Add to cart -
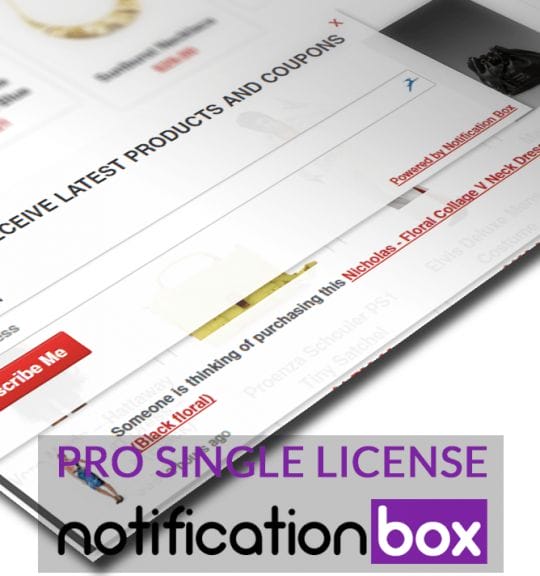
Single License – Notification Box Pro – WordPress Plugin
$39.00 Add to cart
Products
-
Notification Box Lifetime Deal Package
Original price was: $278.00.$160.00Current price is: $160.00.
-
Extension - Cookie Close Notification Box
$19.00
-
Extension - Notification Box Newsletter
$29.00
-
Agency License - Notification Box - WordPress Plugin
Original price was: $230.00.$150.00Current price is: $150.00.
-
Unlimited License - Notification Box Pro - WordPress Plugin
Original price was: $79.00.$60.00Current price is: $60.00.